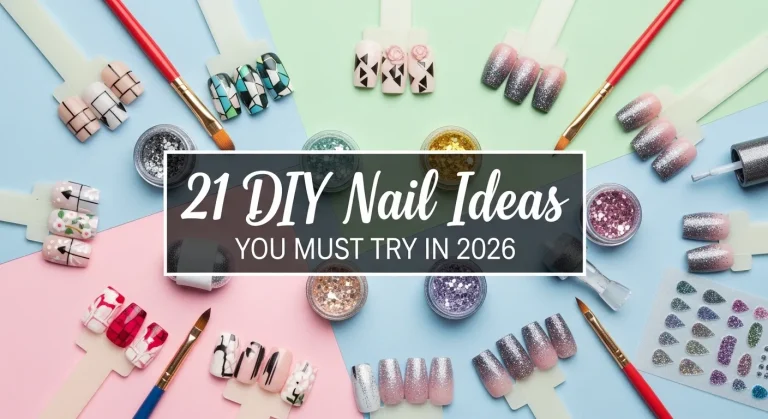
DIY Y2K Nails Without a Salon: Easy Tutorial
The Y2K Nail Look Is Easier Than You Think
Y2K nails are one of the most popular trends in nail art today, but a lot of people assume you need a professional nail technician to pull them off. The truth is that many iconic Y2K elements—glitter, chrome effects, rhinestones, and bold color—are completely achievable at home with the right supplies and a bit of practice.
This tutorial walks you through a complete DIY Y2K nail process, from prepping your nails to adding the finishing embellishments, all without stepping foot in a salon.
What You’ll Need
Before you start, gather your supplies. Having everything laid out in advance makes the process smoother and more enjoyable.
1. Nail Polish Remover and Cotton Pads
To start with a clean slate, remove any old polish and degrease your nails.
2. Nail File and Buffer
Shape your nails and smooth the surface for better polish adhesion.
3. Cuticle Pusher
Push back your cuticles for a cleaner look and more surface area for your design.
4. Base Coat
Protects your natural nails and helps your polish last longer.
5. Y2K-Inspired Nail Polishes
Choose from pastels, holographics, metallics, and glitters. Baby pink, sky blue, silver, and holographic purple are all great starting points.
6. Glitter Topcoat
A chunky or fine glitter topcoat adds instant Y2K sparkle.
7. Chrome Powder or Foil Transfer Kit
These create a mirror-finish effect without a gel lamp. Look for kits that include the powder, applicator, and instructions.
8. Rhinestones and Nail Gems
Flat-back rhinestones in crystal or colored varieties are perfect for Y2K embellishments.
9. Nail Glue
Secure rhinestones and any 3D decorations.
10. Thin Nail Art Brush
For painting swirls, stars, flowers, and other Y2K motifs.
11. Topcoat
A high-gloss topcoat seals your design and adds shine.
Step 1: Prepare Your Nails
Start by removing any existing nail polish with acetone remover and cotton pads. Wash your hands thoroughly and make sure your nails are completely dry. Trim your nails to the desired length and file them into your chosen shape. Almond and stiletto shapes are very Y2K, but square and round work just as well.
Use a cuticle pusher to gently push back your cuticles, and buff the surface of each nail lightly to help the base coat bond. Wipe each nail with a lint-free pad dampened with nail polish remover to remove any oils or dust.
Step 2: Apply Base Coat
Apply a thin, even layer of base coat to each nail and allow it to dry completely. This step protects your nails and prevents staining from colored polishes.
Step 3: Apply Your Base Color
Choose a Y2K-inspired shade as your base. Apply two thin coats, allowing each one to dry before applying the next. Some popular Y2K base colors include holographic silver, baby pink, pale lavender, and mint green. Try to avoid thick coats, which can lead to bubbling and uneven texture.
Step 4: Add Glitter or Chrome
Once your base color is fully dry, apply a glitter topcoat or use chrome powder for a metallic finish. For chrome powder without gel, apply it over a completely dry layer of polish, rub it gently onto the nail surface with a sponge-tipped applicator, and seal with topcoat immediately to prevent smudging.
For foil transfers, apply a foil adhesive to dry nail polish, allow it to become tacky, press the foil shiny side up, peel it off quickly, and seal with topcoat.
Step 5: Create Y2K Nail Art
This is where your personality shines. Dip a thin brush into contrasting polish and draw swirls, daisies, stars, or abstract shapes across one or two accent nails. You don’t need to be perfect—Y2K style is playful and slightly chaotic by design.
Some easy Y2K motifs to try at home include small butterfly outlines in black or white over a bright base, dots arranged in clusters using a dotting tool, tiny stars scattered across a dark or holographic base, and swirling tendrils in silver or gold over a pastel background.
Step 6: Apply Rhinestones
Use a small brush or toothpick to apply a tiny dot of nail glue where you want each rhinestone. Place the rhinestone with tweezers or a rhinestone picker tool, press gently, and hold for a few seconds. Allow the glue to dry before applying topcoat. When using a gel topcoat, the tacky layer after curing can hold rhinestones without additional glue.
Step 7: Seal with Topcoat
Apply a generous layer of high-gloss topcoat over your entire nail, including over any rhinestones and nail art. Cap the free edge of each nail to prevent chips. Let it dry completely before moving on.
Step 8: Clean Up Edges
Use a small brush dipped in acetone to tidy up any polish that landed on your skin or cuticles. This makes a significant difference in how finished your nails look.
Y2K Design Ideas to Try at Home
Glitter Ombre
Apply glitter polish from the tip of the nail downward, blending it with a sponge for an ombre effect. This requires minimal skill but looks professionally done.
Chrome Accent Nail
Paint four nails in a pastel color and apply chrome powder to one accent nail on each hand for a high-contrast Y2K look.
Pastel French with Color Tips
Instead of white tips, use alternating pastel shades—pink, blue, yellow, green—for a modern Y2K French manicure.
Rhinestone Clusters
Group rhinestones at the base of the nail near the cuticle in a crescent shape for a classic Y2K embellishment style.
Maintenance Tips
Reapply topcoat every two to three days to extend the life of your manicure. Avoid prolonged soaking in water. Wear gloves when cleaning or washing dishes. Moisturize your cuticles daily with cuticle oil or hand cream.
Final Thoughts
DIY Y2K nails are accessible, affordable, and incredibly fun to create. With the right supplies and a little patience, you can achieve salon-quality results at home. Start with one or two of the simpler designs and build your skills from there—before long, you’ll be able to recreate even the most intricate Y2K nail art looks without ever leaving your house.